
Essential UV Damage Inspections for Metal Buildings and Concrete to Protect Your Property
Strong sun can make a property look fine from a distance while quietly breaking down the surfaces that protect it. On metal buildings, ultraviolet exposure attacks paint systems, sealants, and roof penetrations. On concrete, it weakens coatings, dries out joint materials, fades stains, and can speed up surface wear when heat, moisture, and movement work together.
UV damage is rarely a one-day event. It builds slowly after long stretches of direct sun, high temperatures, and reflected heat from light-colored concrete, gravel, nearby walls, or metal panels. By the time fading, chalking, cracking, or rust shows up clearly, the protective layer may already be compromised.
A good inspection helps property owners catch those warning signs early. The goal is simple: find surface failure before it turns into leaks, corrosion, cracking, or costly repairs.
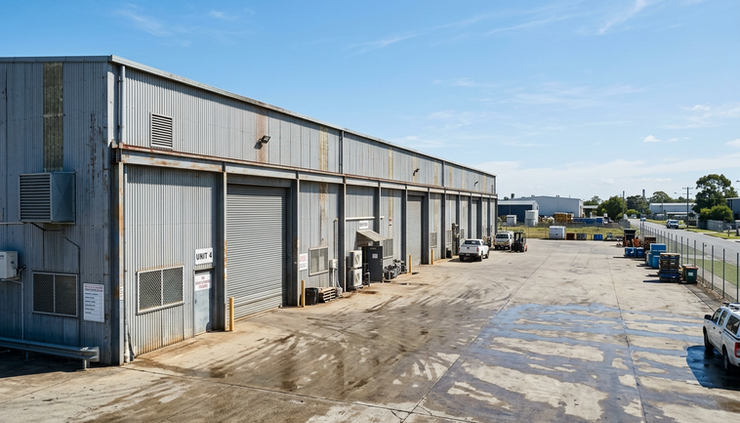
Why strong UV exposure deserves a separate inspection
Many property inspections focus on storms, moisture, pests, impact damage, or age. UV exposure can be easier to overlook because it does not always create dramatic damage at first. A panel may still look straight. A slab may still feel solid underfoot. A roof may not leak yet.
The risk is that UV damage often starts with the materials that protect the structure:
Paint and powder coating on metal panels
Roof coatings and reflective membranes
Sealants around fasteners, trim, doors, windows, and penetrations
Concrete sealers, stains, and surface treatments
Expansion joint fillers and caulks
Elastomeric coatings on parapets, curbs, and transitions
Once those layers break down, moisture can enter. That is when a cosmetic issue becomes a maintenance problem. Rust can form under failed paint. Fasteners can loosen. Concrete joints can open. Cracks can widen after repeated heat cycles and water intrusion.
UV exposure is also stronger in some property conditions:
Open sites with little shade
South- and west-facing walls
Metal roofs with low slope and long sun exposure
Concrete pads that reflect heat onto lower wall panels
High-elevation areas
Hot, dry climates with large day-to-night temperature swings
Coastal or industrial areas where UV damage combines with salt or airborne contaminants
A practical inspection does not try to blame the sun for every defect. Instead, it looks for the chain reaction that often follows heavy exposure: coating failure, sealant failure, moisture intrusion, corrosion, movement, and structural stress.
What UV damage looks like on metal surfaces
Metal itself does not “sunburn” in the way wood or plastic can. The bigger concern is what UV radiation does to the protective finishes on the metal. Once those finishes fail, the metal is more exposed to water, oxygen, pollutants, and temperature movement.
Fading and color change
Fading is one of the earliest and most visible signs of UV exposure. Painted or coated metal panels may lose their original color, especially on walls and roof planes that face the strongest sun.
Look for:
Uneven color between shaded and exposed areas
Lighter panels near roof edges or upper walls
Noticeable fading on south- and west-facing elevations
Trim pieces that no longer match wall panels
Dark colors turning dull or washed out
Fading alone does not always mean urgent repair is needed. It does mean the coating has aged. If fading appears with chalking, flaking, or rust, the finish may no longer be doing its job.
Chalking on painted metal
Chalking happens when the top layer of paint or coating breaks down and leaves a powdery residue. Run a clean hand or dark cloth across the panel. If it picks up a fine dusty film, the coating may be oxidizing from sun exposure.
Mild chalking can be normal on aging coatings. Heavy chalking is a warning sign, especially if the surface looks thin, streaked, or patchy.
A simple wipe test can reveal coating breakdown before rust appears.
When checking for chalking, compare several places:
Fully exposed wall panels
Shaded panels under overhangs
Trim and gutters
Roof panels near ridges, eaves, and penetrations
Metal doors and frames
If the exposed areas show heavy residue while protected areas still look clean, UV exposure is likely a major factor.
Peeling, cracking, or blistering coatings
Paint or coating failure allows moisture to reach the metal surface. Peeling may start around edges, scratches, seams, or fasteners. Blistering can appear when moisture or heat gets trapped beneath a weakened coating.
Inspect these areas closely:
Lower wall panels near concrete
Areas below gutters and drip edges
Scratched or dented panels
Panel laps and seams
Door frames and overhead door jambs
Roof penetrations
Places where dissimilar metals touch
Use light pressure with a plastic scraper or gloved finger to see if loose coating flakes away. Do not chip sound coating aggressively. The goal is to identify weak areas without making them worse.
Rust stains and corrosion
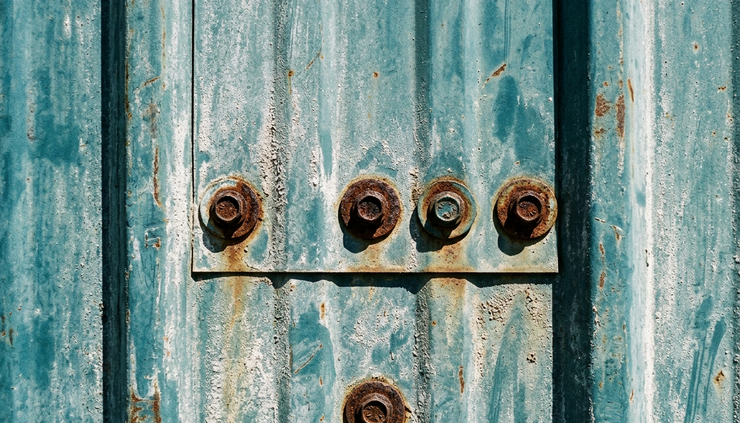
Rust may show up as orange staining, dark streaks, bubbling paint, or rough metal. On painted metal buildings, corrosion often begins where the coating has been scratched, cracked, or worn thin.
Pay close attention to:
Fastener heads and washers
Panel edges
Cut edges around openings
Base trim near concrete slabs
Gutters, downspouts, and splash zones
Roof laps and seams
Areas under failed sealant
Rust stains on the outside of a panel can sometimes come from a fastener, bracket, or nearby component rather than the panel itself. Track the stain upward to find the source. If rust is visible around fasteners, check whether the washer has dried, cracked, or pulled away.
Sealant breakdown around joints and penetrations
UV exposure is hard on many sealants. Over time, caulk and sealant can become brittle, shrink, crack, or lose adhesion. Once that happens, water can enter around openings and transitions.
Look for sealant that is:
Cracked down the center
Pulling away from one side of the joint
Hard and brittle instead of flexible
Missing in sections
Stained, dirty, or split
Flattened or separated around fasteners
Common trouble spots include window perimeters, door frames, roof curbs, vent pipes, flashing, ridge caps, gutters, and wall-to-roof transitions.
Fastener and washer wear
Many metal buildings rely on exposed fasteners. UV exposure and heat can age rubber or neoprene washers, especially on roofs. Once washers crack or lose compression, water can enter around the screw.
Signs include:
Cracked washer edges
Rust around screw heads
Backed-out screws
Elongated holes
Missing fasteners
Streaking below fastener lines
Slight panel movement around attachment points
Fastener problems can be small individually, but a roof with many failing washers can develop widespread leakage.
What UV damage looks like on concrete
Concrete reacts differently to UV exposure than metal. The cement matrix itself is not as UV-sensitive as paint, plastic, or sealant. The bigger concern is that sun and heat break down the materials on and within the concrete system, including sealers, stains, coatings, joint fillers, and repair patches.
UV exposure also raises surface temperatures. Heat causes expansion, speeds drying, and can add stress when the slab cools again after sunset or rain.
Faded stains, sealers, and coatings
Decorative concrete, sealed slabs, and coated surfaces can fade or dull after long UV exposure. This is often most visible on driveways, walkways, loading areas, patios, and exposed equipment pads.
Look for:
Uneven color
Dull or patchy sheen
Peeling clear sealer
Whitening or hazing
Areas where water no longer beads
Exposed aggregate that looks dry or washed out
A worn sealer may not seem serious at first. Yet sealers help limit water, oil, salts, and other contaminants from entering the surface. Once the sealer fails, stains and freeze-thaw damage can become more likely in colder climates.
Surface cracking and crazing
Fine surface cracks can form from shrinkage, thermal movement, poor curing, or a mix of stress factors. UV exposure contributes by heating and drying the surface, especially in open areas with no shade.
Crazing looks like a network of very fine shallow cracks. It may not threaten the slab right away, but it can collect dirt and moisture. Wider cracks deserve more attention.
During inspection, note:
Crack width
Crack length
Whether edges are lifting or curling
Whether water collects in the crack
Whether the crack crosses a joint
Whether the crack continues into nearby walls, curbs, or foundations
A single hairline crack may only need monitoring. A widening crack, a crack with vertical displacement, or a crack that allows water intrusion needs closer review.
Spalling, scaling, and surface dusting
Spalling happens when parts of the concrete surface break away. Scaling is surface flaking. Dusting leaves a powdery residue when the surface wears down.
UV exposure is not usually the only cause. Heat, moisture, trapped salts, poor finishing, freeze-thaw cycles, and coating failure can all play a role. Still, strong sun can worsen surface drying and make weak areas more noticeable.
Check for:
Flaking near joints
Small pits or pop-outs
Loose surface particles
Rough patches where coating has peeled
Dusty residue after sweeping
Exposed aggregate in traffic areas
If the surface is shedding material, the concrete needs protection from further water and chemical intrusion.
Failed expansion joints and control joints
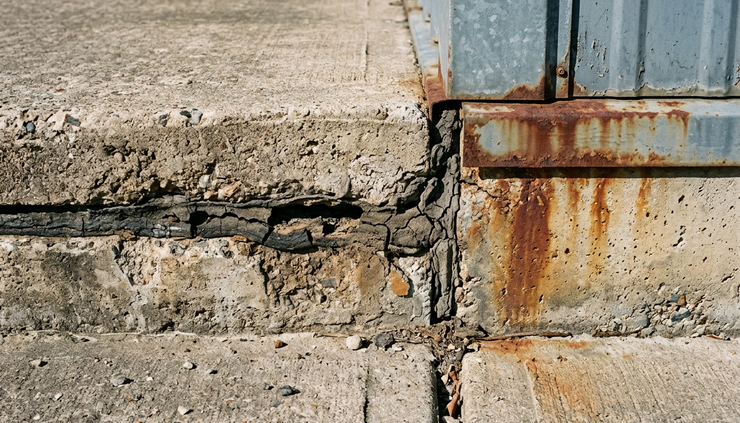
Joint materials often age faster than the concrete itself. UV exposure can dry, shrink, and crack joint fillers. Once joints open, water can enter and debris can pack into the gap. That limits movement and may cause edge damage.
Inspect joints for:
Missing joint filler
Cracked or sunken caulk
Weed growth
Standing water
Broken slab edges
Debris packed tightly into the joint
Uneven movement across the joint
Joints exist because concrete moves. Keeping them clean, flexible, and sealed helps prevent random cracking and edge failure.
Heat-related movement near metal buildings
Metal and concrete expand and contract at different rates. Around metal buildings, this matters at slab edges, base angles, door thresholds, bollards, loading entrances, and equipment pads.
Repeated heat cycles can reveal weak spots where materials meet. Look for gaps, crushed sealant, cracked grout, loose anchors, or rust staining at the base of metal panels.
Concrete that reflects heat onto wall panels can also accelerate fading and sealant wear along lower elevations. This is common near wide aprons, sidewalks, drive lanes, and loading areas.
Structural issues that can follow prolonged UV exposure
UV damage often starts at the surface, but surface failure can invite structural problems. The inspection should look beyond appearance and ask a practical question: has the protective system failed enough to affect performance?
Corrosion can weaken metal components
When coatings fail and moisture reaches metal, corrosion can spread. Light surface rust may be manageable. Deep corrosion, section loss, or rust around connections is more serious.
Structural concerns include:
Rusted girts, purlins, or framing members
Corroded base plates or anchor bolts
Deteriorated roof panel attachments
Rust around welds or bolted connections
Metal thinning at gutters, edges, and laps
Loose bracing or connection hardware
If rust appears on primary framing, not just cladding or trim, bring in a qualified contractor, structural engineer, or building inspector. Structural metal should not be evaluated by appearance alone when corrosion is advanced.
Water intrusion can damage hidden areas
Failed coatings and sealants can let water move behind panels, into wall cavities, or under roofing. The damage may show up indoors before it is obvious outside.
Look inside the building for:
Water stains on insulation
Damp spots after rain
Moldy odors
Rust streaks on interior framing
Stained ceiling liners
Wet floors near exterior walls
Daylight visible through gaps
Condensation patterns that changed recently
A UV-damaged sealant bead outside can become an interior moisture problem months later.
Concrete cracks can affect drainage and support
Cracks, joint failure, and spalling can change how water moves across a site. Water that used to drain away may begin collecting near a foundation, slab edge, or column base.
Watch for:
Ponding water after rain
Soil washout near slab edges
Slab settlement
Trip hazards
Cracks near columns or load-bearing walls
Gaps below thresholds
Concrete breaking around anchor bolts
Concrete around metal buildings often supports equipment, vehicles, storage racks, bollards, or doors. Surface defects can affect safety and function even when the main slab is still serviceable.
Thermal movement can loosen connections
Strong sun heats metal panels quickly. As panels expand and contract, fasteners and seams absorb movement. If coatings and washers have aged, the system may lose some ability to stay tight and weather-resistant.
Look for:
Oil-canning or visible panel distortion
Loose trim
Gaps at laps
Screws that have backed out
Popping sounds during temperature swings
Sealant tearing at joints
Misaligned doors or frames
Not every wavy panel is a structural defect. Metal panels can show normal movement. The concern rises when movement appears with leaks, fastener failure, or distorted framing.
How to conduct a thorough UV damage inspection
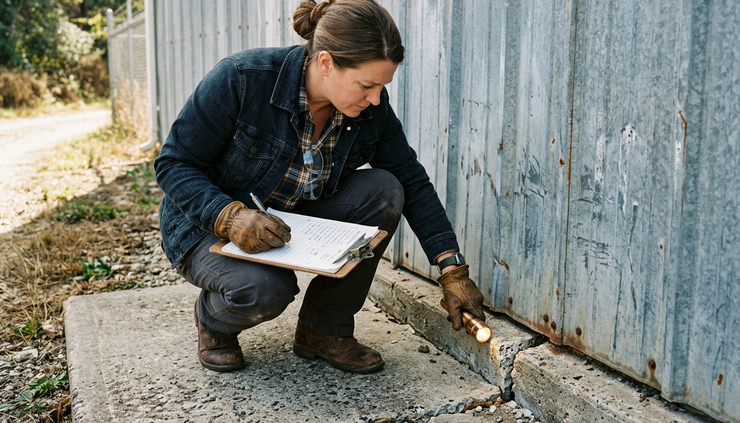
A good inspection works best when it follows a clear route. Do not start randomly. Move around the property in a repeatable pattern, document what you see, and compare exposed areas with shaded areas.
Choose the right time and conditions
Inspect on a dry day with good light. Early morning or late afternoon can make surface texture easier to see because shadows reveal cracks, waves, and raised edges. Midday sun helps show glare, fading, and chalking.
Avoid walking metal roofs unless you have proper fall protection, training, and permission from the property owner or manager. Many issues can be spotted from ladders, lifts, drones, upper windows, or the ground with binoculars. If roof access is needed, use a qualified professional.
Bring basic tools:
Clipboard or inspection app
Phone or camera
Flashlight
Binoculars
Clean cloth for chalking checks
Tape measure or crack gauge
Marker flags or painter’s tape
Gloves and safety glasses
Nonmetallic probe or plastic scraper
Moisture meter if interior leaks are suspected
Start with a site walkaround
Begin at the exterior and walk the entire property. Note which elevations receive the most sun. In most U.S. locations, south and west exposures often show heavier UV wear.
Document:
Building orientation
Areas with no shade
Reflective concrete surfaces
Roof overhangs and shaded walls
Drainage patterns
Landscaping that traps moisture
Areas exposed to chemicals, salt, or vehicle traffic
Take wide photos first. Then take close-ups. Wide photos show location. Close-ups show condition. Include a reference object, such as a ruler or coin, when photographing cracks or coating loss.
Compare exposed and shaded materials
Comparison is one of the easiest ways to identify UV-related wear. Look at the same material in different exposure zones.
For metal, compare:
South wall panels with north wall panels
Panels under overhangs with fully exposed panels
Roof sections near shade with open roof sections
Old touch-up areas with original finishes
For concrete, compare:
Sealed concrete under shade with open concrete
Joint filler near walls with joint filler in full sun
Covered entry slabs with exposed walkways
Low-traffic areas with sun-exposed traffic lanes
If the exposed surface shows more fading, chalking, cracking, or brittleness, UV exposure is likely part of the damage pattern.
Inspect from the top down
Water moves downward, so inspect high areas first when possible. Roof edges, gutters, and upper panels often explain stains and failures below.
Check the roof and upper metal areas for:
Faded roof panels
Chalking roof coatings
Loose ridge caps
Cracked sealant around penetrations
Failed fastener washers
Rust at laps and seams
Debris that holds moisture
Gutter overflow marks
Then move down to wall panels, trim, doors, and base conditions. Look for patterns. A rust stain on a lower panel may come from a failing fastener or gutter above.
Check concrete surfaces in sections
Divide concrete areas into zones, such as entrances, loading areas, walkways, drive lanes, pads, and slab edges. This keeps the inspection organized and helps compare conditions later.
For each zone, record:
General surface condition
Sealer or coating condition
Crack locations
Joint condition
Drainage and ponding
Edge damage
Stains, spalling, or scaling
Trip hazards
Contact points with metal components
Use a simple severity scale:
Condition | What it means | Typical next step |
Minor fading or light chalking | Protective layer is aging but mostly intact | Clean, monitor, and plan maintenance |
Cracked sealant or worn joint filler | Water may enter soon or already has | Remove failed material and reseal |
Peeling coating or exposed metal | Protection has failed in that area | Prep, prime, and recoat |
Rust or concrete spalling | Deterioration is active | Repair source and restore protection |
Movement, settlement, or deep corrosion | Performance may be affected | Get professional evaluation |
Look for patterns instead of isolated defects
One cracked sealant joint may be a small repair. Cracked sealant around every sun-facing opening suggests a larger maintenance cycle is due. The same applies to chalking paint, failing joint filler, or rusted fasteners.
Ask these questions during the inspection:
Is the damage limited or widespread?
Is it worse on sun-facing surfaces?
Is water entering the building?
Are coatings failing at edges and penetrations?
Are cracks growing compared with past photos?
Are structural connections affected?
Are repairs from past years failing again?
Patterns help set priorities. They also make repair planning more accurate.
Maintenance steps that protect metal and concrete
Regular maintenance is the difference between a small repair and a major restoration. UV exposure cannot be stopped, but the damage it causes can be slowed.
Clean surfaces before judging their condition
Dirt, oxidation, pollen, and pollutants can make surfaces look worse or hide real defects. Clean test areas before deciding whether a coating has failed.
For metal buildings:
Use mild detergent and water for routine washing
Avoid harsh abrasives that scratch coatings
Rinse thoroughly to remove residue
Keep gutters and downspouts clear
Remove debris from roof valleys and wall bases
For concrete:
Sweep debris from joints and cracks
Wash surface dirt before checking sealer condition
Remove oil or chemical spills promptly
Avoid aggressive pressure washing that erodes weak surfaces
Keep drainage paths open
Cleaning also gives a better surface for sealants, primers, and coatings to bond.
Repair sealants before they fail completely
Sealants are often the first line of defense around openings and transitions. Once they turn brittle or separate, water can enter even if the panels and concrete still look acceptable.
A proper reseal usually includes:
Removing loose or failed material
Cleaning the joint
Letting the area dry
Using backer rod where needed
Applying the correct sealant for the joint type
Tooling the sealant for good contact
Allowing proper cure time
Do not simply smear new caulk over cracked material. That may look better for a short time, but it often fails quickly because the bond is poor.
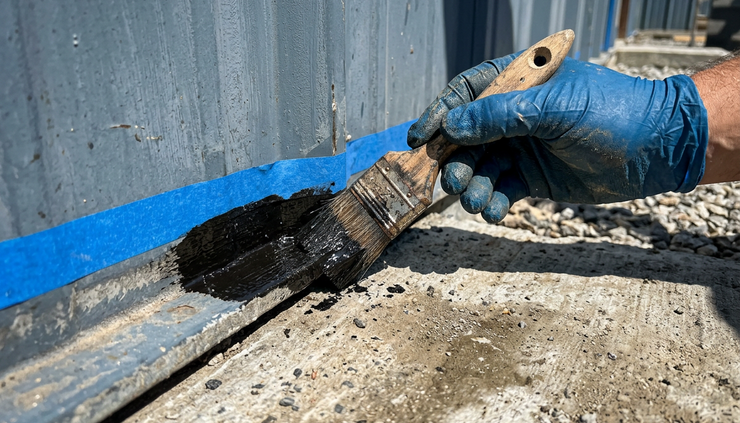
Recoat metal before corrosion spreads
Protective coatings matter because they separate metal from the environment. Once coating failure exposes bare metal, corrosion can start.
A sound metal maintenance plan may include:
Washing and surface preparation
Removing loose paint and rust
Spot priming exposed metal
Replacing failed fasteners and washers
Sealing laps and penetrations as needed
Applying compatible topcoats
Following manufacturer guidance for film thickness and cure conditions
Compatibility matters. Not every coating works over every existing finish. When in doubt, test a small area or ask a coatings professional.
Reseal concrete on a schedule
Concrete sealers do not last forever. UV exposure, traffic, abrasion, and weather wear them down. A slab that no longer sheds water or resists staining may need resealing.
Before resealing, check for:
Moisture trapped in the slab
Existing sealer compatibility
Surface contamination
Cracks that need repair
Joint filler that needs replacement
Areas of scaling or spalling
A new sealer over dirty, damp, or failing material may peel. Preparation usually determines how long the protection lasts.
Address drainage and reflected heat
Strong UV exposure can be made worse by standing water and reflected heat. Concrete aprons, gravel, light-colored paving, and metal surfaces can bounce heat back toward wall panels and joint materials.
Practical improvements include:
Correcting low spots that hold water
Extending downspouts away from slabs and foundations
Keeping splash blocks in place
Improving grading near building edges
Using compatible sealants at slab-to-wall transitions
Adding shade where practical
Choosing lighter or more reflective roof coatings when appropriate
Be careful with shade additions such as awnings, screens, or vegetation. They should not trap moisture against metal panels or block drainage.
Preventive measures for future UV damage
Prevention works best when it is planned before materials fail. It starts with inspection records and continues with the right products, repair timing, and maintenance habits.
Create a simple inspection calendar
Most properties benefit from at least one exterior inspection each year. Higher-exposure sites may need seasonal checks, especially after summer heat or before winter weather.
A practical schedule may look like this:
Timing | What to inspect |
Spring | Winter damage, concrete cracks, joint openings, coating wear |
Mid to late summer | UV fading, chalking, sealant brittleness, roof coating condition |
Fall | Drainage, gutters, roof penetrations, concrete sealing needs |
After severe weather | Loose panels, leaks, displaced sealant, new cracks |
Keep photos from year to year. They make changes easier to spot and help contractors understand the history of a problem.
Choose UV-resistant products
When repairing or upgrading, use products designed for exterior exposure. This applies to coatings, sealants, joint fillers, tapes, primers, and concrete sealers.
Look for product information that addresses:
Exterior UV resistance
Compatibility with metal or concrete
Flexibility for moving joints
Temperature range during application
Surface preparation requirements
Expected maintenance needs
Resistance to water, abrasion, or chemicals
The cheapest product can become expensive if it fails early. Match the material to the exposure level and the movement of the joint or surface.
Protect vulnerable transitions
UV damage often appears first where different materials meet. These areas move, absorb heat differently, and collect water.
Inspect and protect:
Metal panel bases at concrete slabs
Door thresholds
Window perimeters
Roof curbs and penetrations
Wall-to-roof joints
Expansion joints
Loading dock edges
Bollard bases
Equipment pads
Transitions deserve more attention than broad flat surfaces because small failures there often lead to leaks or corrosion.
Manage vegetation, debris, and stored materials
Shade can reduce UV exposure, but trapped moisture creates another risk. Keep vegetation trimmed back from metal walls. Do not store materials tight against exterior panels or on concrete joints where they hold moisture and block inspection.
Keep these areas clear:
Base trim
Wall panels near grade
Downspout outlets
Slab edges
Expansion joints
Door thresholds
Roof drainage paths
Clear access also makes inspections faster and more accurate.
Know when to call a professional
Property owners can identify many early warning signs, but some conditions need expert evaluation.
Call a qualified professional when you find:
Deep rust or metal section loss
Repeated leaks after sealant repairs
Widespread roof fastener failure
Large areas of peeling coating
Concrete cracks with vertical displacement
Slab settlement near the building
Rusted anchor bolts or base plates
Cracks near structural columns
Spalling that exposes reinforcing steel
Doors or frames that no longer operate correctly
Professional help is also wise before applying large coating systems. Surface preparation, moisture testing, and product compatibility can make or break the project.
A practical inspection checklist for property owners
Use this checklist after periods of strong sun, extended heat, or whenever exterior surfaces begin to look dull, cracked, or dry.
Metal building exterior
Check for:
Faded or uneven paint color
Powdery chalking on panels
Peeling, blistering, or cracked coating
Rust stains or exposed bare metal
Loose, missing, or backed-out fasteners
Cracked fastener washers
Failed sealant around windows and doors
Gaps at trim, flashing, and laps
Distorted panels or unusual movement
Gutter leaks or overflow marks
Interior stains below roof or wall transitions
Concrete areas
Check for:
Faded stain or dull sealer
Water soaking in instead of beading
Fine crazing or surface cracks
Wider cracks that are growing
Spalling, scaling, or dusting
Failed expansion joint filler
Standing water or poor drainage
Broken edges at joints
Trip hazards
Gaps where concrete meets metal components
Rust stains near base plates or anchors
Documentation
Record:
Date and weather conditions
Location of each defect
Photos from wide and close views
Crack width or approximate size
Whether damage is new or recurring
Areas needing immediate repair
Areas to monitor at the next inspection
A checklist only works if it leads to action. Rank findings by risk. Leaks, corrosion, settlement, and safety hazards come first. Cosmetic fading and mild chalking can go into a planned maintenance schedule.
The best time to act is before the protective layer fails
UV exposure is part of owning exterior metal and concrete surfaces. The trouble starts when sunlight and heat break down the coatings, sealants, and joint materials that keep water and corrosion out.
A careful inspection helps separate normal aging from early failure. Look for fading, chalking, brittle sealant, worn concrete sealer, open joints, rust, cracks, and drainage changes. Compare shaded and exposed areas. Take photos. Track patterns over time.
Preventive maintenance is usually simpler than repair after failure. Clean the surfaces, reseal joints, recoat vulnerable metal, protect concrete, and correct drainage issues before damage reaches the structure beneath. With a consistent inspection routine, property owners can extend service life, reduce surprise repairs, and keep metal buildings and concrete surfaces performing as they should.

Comments