
Planning a Weld Up Steel Building for Ranch Equipment Storage
A ranch storage building has to do more than keep rain off a tractor. It needs to handle wide equipment, dusty work, changing seasons, heavy use, and the daily reality of people backing trailers, loading feed, repairing implements, and moving in a hurry.
That is why a weld-up steel building can be a strong fit for ranch equipment storage. It gives you a custom layout, a rigid frame, long service life, and room to plan around the way the ranch actually works. The best results come from careful planning before the first post is set or the first weld is made.

Start with the equipment, not the building
The most useful storage buildings are planned from the inside out. Before deciding on width, length, wall height, or door placement, list what the building must hold now and what it may need to hold later.
Include the big items first:
Tractors with loaders
Hay equipment
Stock trailers
Flatbed trailers
ATVs and utility vehicles
Seeders, discs, and rakes
Portable panels and gates
Feed, parts, and tools
Measure the actual equipment. Do not rely on brochure dimensions if attachments, mirrors, dual wheels, or aftermarket parts change the footprint. Add clearance for turning, walking, loading, and repairs.
A common planning mistake is sizing the building only for parked equipment. That creates a tight shed, not a working storage space. A ranch building often needs space for:
Pulling a tractor in without folding every attachment
Opening trailer doors
Backing in during bad weather
Working around a machine with tools
Storing seasonal items without blocking daily-use equipment
Think in zones. One area can hold daily-use machines near the main door. Another can hold seasonal implements. A side bay can serve as a repair area. A narrow wall zone can store oil, filters, chains, grease, tools, and spare parts.
Leave more aisle space than you think you need. Tight layouts usually cost more time than they save in square footage.
Choose a site that works in bad weather
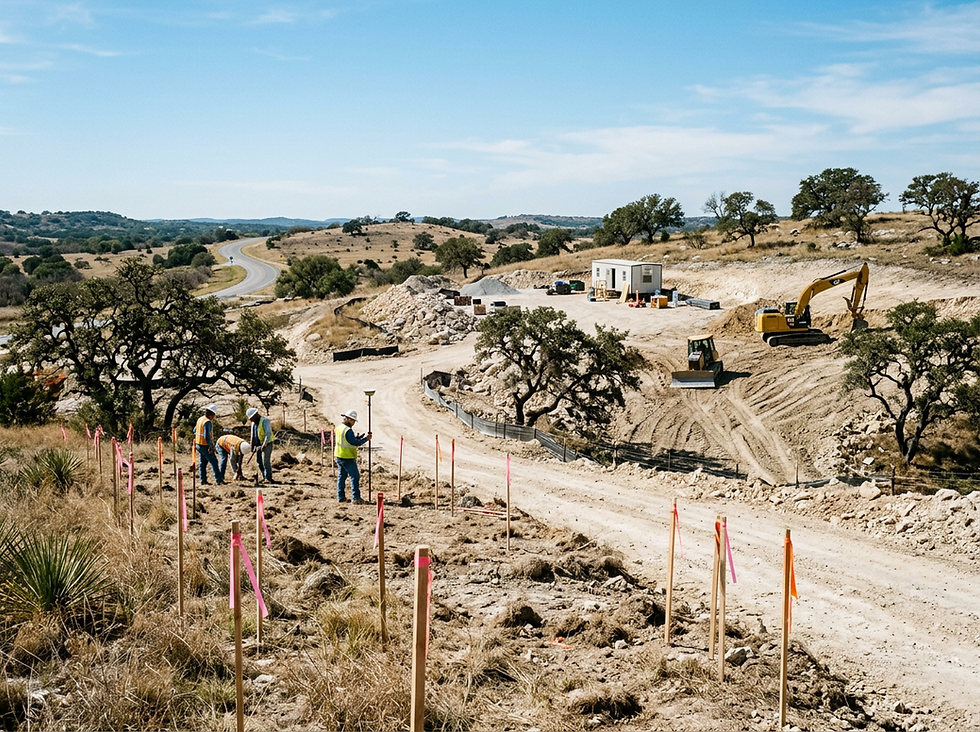
A building site may look fine on a dry afternoon and fail after three days of rain. For ranch equipment storage, site selection should focus on access, drainage, soil support, and daily workflow.
The building should sit where equipment can move in and out without creating ruts or tight turns. If trucks deliver feed, seed, fuel, or materials, they need a clear approach. If trailers need to back in, allow enough straight-line distance in front of the doors.
Drainage matters just as much as access. Steel buildings hold up well, but standing water around the slab or posts can cause long-term problems. Plan the site so surface water moves away from the building.
Look for:
A slightly elevated area
Good runoff away from doors
Room for gravel aprons
Access from existing ranch roads
Safe distance from flood-prone draws
Space for future expansion
Soil conditions also affect the foundation. Expansive clay, loose fill, and poorly compacted soil can lead to slab movement or uneven settlement. A local contractor, engineer, or building official can help determine what foundation design fits the site.
Do not forget wind direction. If winter storms usually come from one side, door placement and overhangs should account for it. If summer heat is a concern, orientation can help with shade and airflow.
Decide what the weld-up frame needs to do
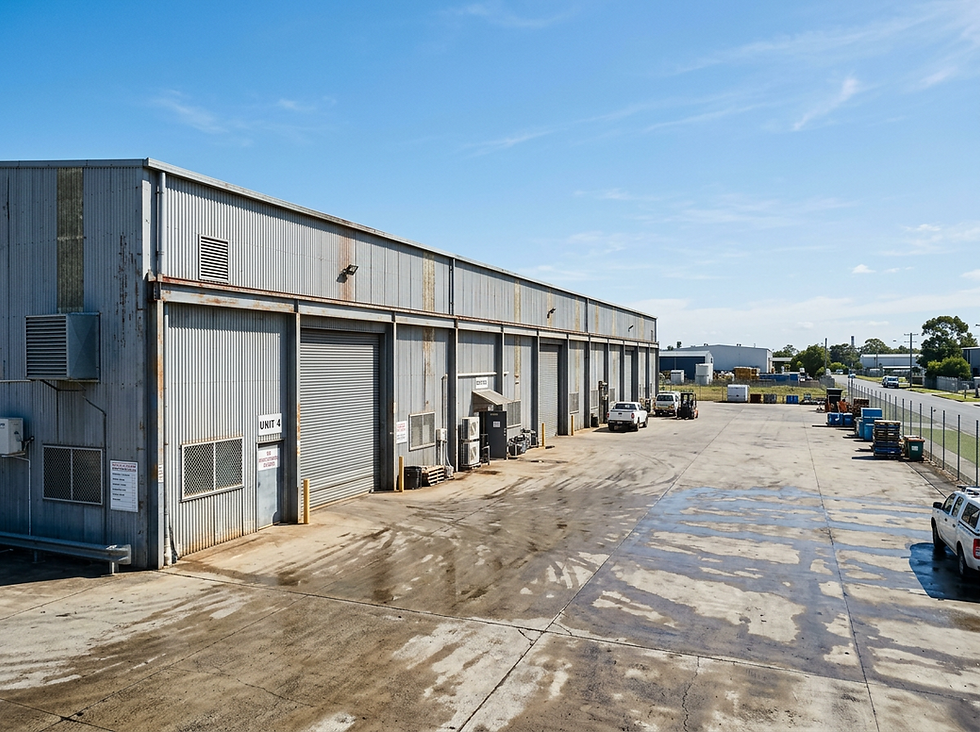
A weld-up steel building is fabricated and welded on site from steel members. That makes it flexible. It can be shaped around custom bay spacing, unusual dimensions, tall equipment, lean-tos, wide openings, and ranch-specific layouts.
That flexibility also means the structure needs proper design. Steel is strong, but strength comes from the full system, not just individual parts. Columns, rafters, purlins, girts, bracing, welds, anchors, and the foundation all work together.
For structural integrity, plan around these loads:
Dead load from the building materials
Live load from maintenance access or storage features
Wind load based on local exposure
Snow load in colder regions
Seismic considerations where required
Door loads, especially for large overhead doors
Wide doors are useful for ranch equipment, but they change the frame. A large opening removes wall bracing and adds stress around the header and columns. That does not mean wide doors are a problem. It means they must be included in the design from the start.
The same applies to lean-tos, cranes, loft storage, solar panels, insulation, and interior partitions. Adding them after construction can be more expensive and may require structural changes.
A steel building is only as strong as its connections. Good welding, proper fit-up, correct bracing, and a sound foundation matter as much as the size of the frame.
When planning a weld-up steel building for ranch equipment storage, use a qualified builder who understands local code requirements and ranch use. For larger spans, high wind areas, heavy snow areas, or anything beyond a simple shed, engineered drawings are a smart investment.

Pick materials for durability and daily use
Steel buildings are popular on ranches because they can take years of hard use with limited upkeep. They resist rot, termites, and many problems that affect wood structures. They also handle large clear spans well, which is useful when storing wide equipment.
Material choices still matter. The frame, roof, wall panels, fasteners, doors, and insulation all affect performance.
Frame steel
The frame should match the design loads and bay spacing. Common weld-up buildings use structural steel columns and rafters with purlins and girts to support roof and wall panels. Member sizing should come from the building design, not guesswork.
Ask how the steel will be prepared and protected. Primer, paint, or other coatings help guard against corrosion, especially in humid climates or areas where fertilizer, chemicals, or livestock waste may be nearby.
Roof and wall panels
Metal panels vary in thickness, profile, finish, and coating. Thicker panels and quality finishes usually hold up better against dents, weather, and long-term sun exposure. A lighter color can help reduce heat gain in warm regions.
For ranch use, look at panel layout around high-abuse areas. If trailers, loaders, or pallets will be near a wall, consider protective bollards, wainscot panels, or interior guards.
Fasteners and trim
Fasteners are small, but they matter. Exposed fasteners with weather seals are common on agricultural buildings. They need correct installation to prevent leaks. Overdriven or misaligned screws can cause problems over time.
Trim also protects the building. Ridge caps, corner trim, base trim, eave trim, and door flashing help shed water and seal gaps.
Doors
Doors shape daily use. A building may need a mix of overhead doors, sliding doors, walk-through doors, and open bays.
For large equipment, overhead doors offer convenience and a good seal, but they need headroom and maintenance. Sliding doors can cover wide openings, but they need wall space to slide and can be harder to seal in windy or dusty areas. Open bays are fast and simple, though they offer less weather protection.
Match door height to your tallest equipment with extra clearance. Antennas, cabs, exhaust stacks, and loader arms are easy to forget.
Plan the slab, floor, and approach areas
The floor may be concrete, compacted gravel, or a mix of both. The right choice depends on budget, use, and maintenance needs.
A concrete slab works well for repair areas, tool storage, small parts, and equipment that should sit on a clean, stable surface. It also makes rolling jacks, creepers, carts, and toolboxes easier to use.
Gravel can work for simple covered storage, especially for implements that do not need a finished floor. Gravel drains well when properly built, but it can rut, shift, and collect weeds or dust.
Many ranches benefit from a hybrid layout:
Concrete work bay for repairs, tools, and daily-use machines
Concrete apron at main doors to reduce mud and rutting
Gravel storage bay for seasonal implements and trailers
Compacted access drive for trucks, tractors, and deliveries
The approach to the building deserves planning too. A muddy entrance can make even the best building frustrating. Use compacted base material, proper grading, and a wide turning area. If possible, extend a concrete or gravel apron beyond the door opening so equipment can line up before entering.
Make the space easy to use
A ranch equipment building should save time every week. Layout choices have a direct effect on that.
Start with the main movement path. Daily-use equipment should not be trapped behind seasonal implements. If a tractor feeds livestock every morning, park it near a door. If hay tools only move during part of the year, store them deeper inside.
Useful space planning tips include:
Place large doors where turning is easiest
Keep the tallest equipment near the highest clearance
Store attachments along one wall instead of scattered across the floor
Use wall racks for chains, straps, hoses, and hand tools
Add shelves or cabinets for filters, fluids, and spare parts
Leave a clear service area around one bay
Plan lighting over work zones, not just down the center
Vertical space can help, but use it carefully. Loft storage may work for light parts and seasonal supplies, but it adds load to the structure. Heavy items should stay low and easy to move with a loader, pallet forks, or a hand truck.
Consider future equipment. Ranches change. A building that fits today’s tractor may feel small after a larger baler, wider trailer, or cabbed utility tractor arrives. If the budget allows, add length or width now rather than rebuilding later.

Design for ventilation, light, and comfort
Ventilation is often overlooked in equipment storage, but it affects moisture, fumes, heat, and the life of stored machines. Steel buildings can trap heat and condensation if they are sealed without airflow.
Good ventilation can be simple. Ridge vents, vented soffits, wall louvers, turbine vents, cupolas, exhaust fans, and openable doors can all help move air. The right setup depends on climate and building use.
Ventilation helps with:
Reducing condensation under roof panels
Moving exhaust fumes out of the building
Lowering summer heat buildup
Drying wet equipment after use
Reducing trapped smells from fuel, oil, or chemicals
If the building will include a repair bay, plan for more airflow than a basic storage shed needs. Running engines indoors can create dangerous exhaust buildup. Proper doors, fans, and safe work habits matter.
Natural light also improves daily use. Translucent wall panels, windows, or open bays can reduce the need for electric lights during the day. Place windows where they add light without creating security concerns or wall space conflicts.
Insulation may be worth adding if the building will be used for repairs, storage of sensitive supplies, or work during cold months. It can also help control condensation. If insulation might be added later, plan panel details and interior clearance now.
Understand the construction sequence
A smooth build starts with clear plans and ends with a final walkthrough. Each project varies, but the process often follows a familiar path.
Define the building requirements
List equipment, storage needs, door sizes, power needs, water needs, and future expansion plans.
Select the site
Confirm access, drainage, grade, soil conditions, setbacks, and utility locations.
Create drawings and check code requirements
Local rules may cover permits, setbacks, wind ratings, snow loads, electrical work, foundation design, and inspections.
Prepare the site
Clear vegetation, grade the pad, compact the base, and build access for crews and deliveries.
Install the foundation or slab
This may include footings, piers, anchor bolts, forms, reinforcing steel, vapor barrier, and concrete placement.
Build and weld the steel frame
Crews set columns, rafters, purlins, girts, and bracing. Alignment and bracing need careful attention before final welding and panel installation.
Install roof and wall panels
Panels, trim, flashing, fasteners, and closures turn the frame into a weather-tight structure.
Add doors, ventilation, insulation, and utilities
Overhead doors, walk doors, fans, vents, lights, outlets, and other systems should match the original plan.
Complete the final inspection and punch list
Check door operation, drainage, leaks, fasteners, weld quality, lighting, ventilation, and site cleanup.
Do not rush the early steps to start construction faster. Most expensive fixes come from decisions made before the building went up.
Keep the budget focused on long-term value
Steel buildings are often cost-effective because they last, need less maintenance than many wood structures, and can provide wide open space without many interior supports. The lowest initial bid may not give the best value, though.
Compare bids by scope, not just price. One proposal may include heavier materials, better coatings, doors, trim, slab work, site prep, or engineered plans. Another may leave those items out.
Budget for the full project:
Design or engineering
Permits and inspections
Site grading and drainage
Foundation or slab
Steel frame and panels
Doors and hardware
Ventilation
Electrical work
Lighting
Interior storage features
Gravel or concrete approaches
A building that protects equipment well can help reduce weather damage, slow rust, and keep machines ready for use. It can also save time by keeping attachments, tools, and parts in one place. Those savings are real, even if they do not show up as a line item on the construction quote.

Plan the building like a working tool
A weld-up steel building is not just a shelter. It becomes part of the ranch workflow. The right site keeps equipment moving. The right frame handles local loads. The right doors and layout make daily work easier. The right ventilation protects people, machinery, and the building itself.
Plan from real equipment measurements. Build around access and drainage. Use materials that fit long-term ranch use. Give the structure the engineering it deserves. Leave room for the ranch to grow.
A well-planned steel equipment building pays back in fewer headaches, better protection, and a cleaner, safer place to work through every season.

Comments